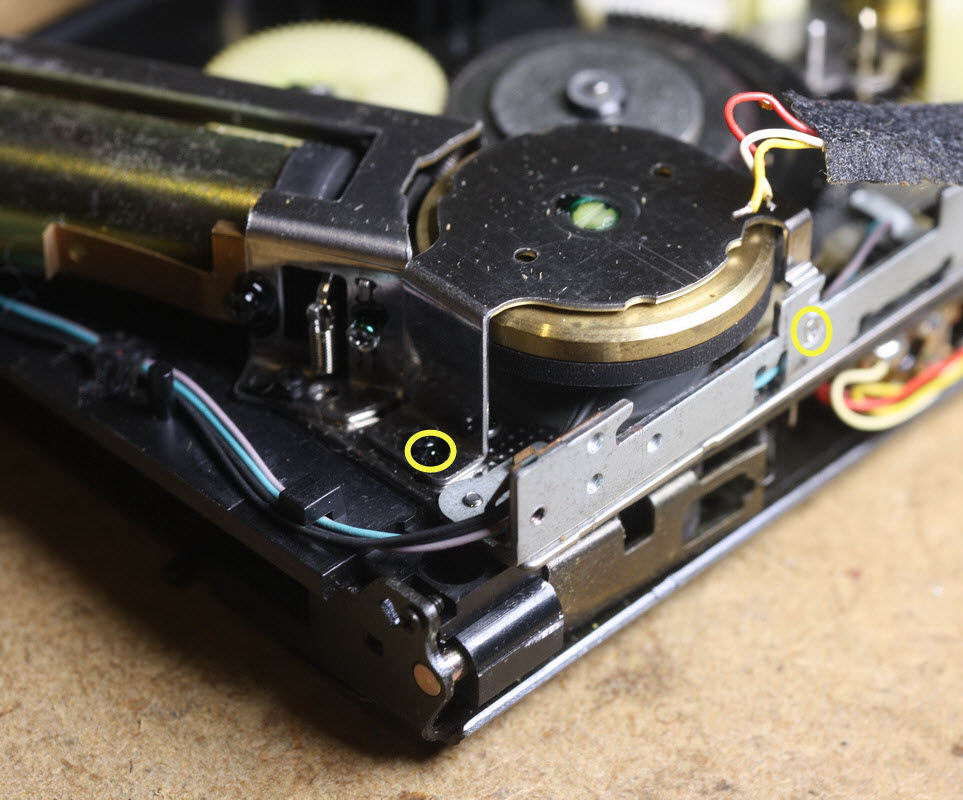
Capstan wheel removal
First unscrew the two screws holding the capstan wheel cover, remove the cover, and then remove the capstan wheel.
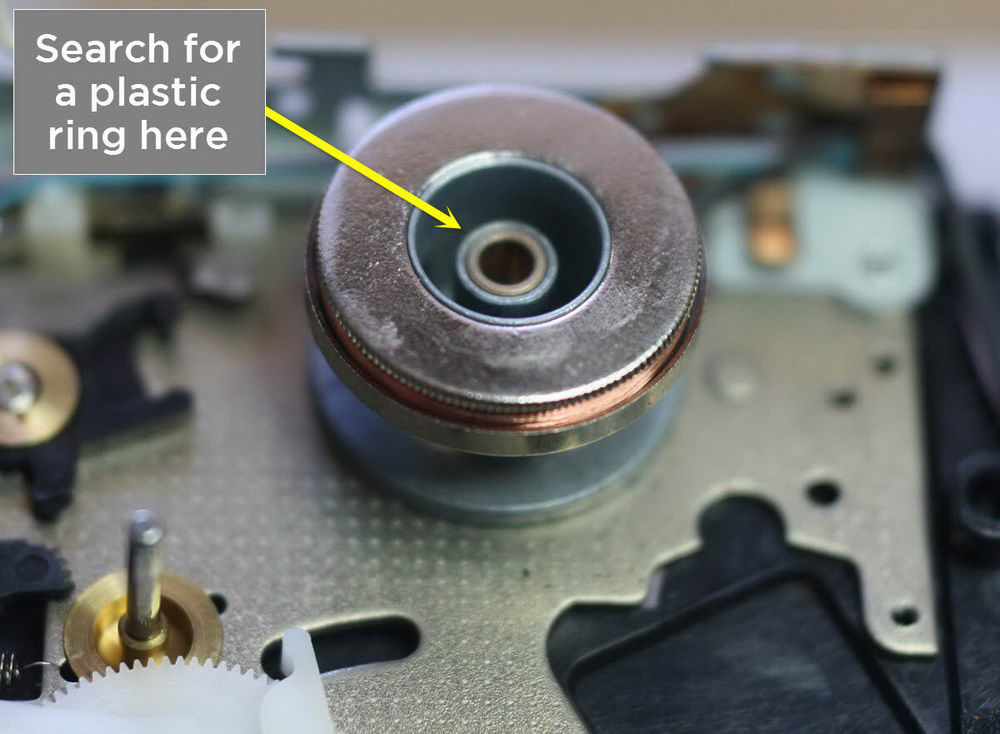
Warning! There is a tiny plastic ring inserted on the capstan axle. It is barely visible and very easily lost, if you do not notice that it’s there. It can be either black or transparent. Especially those transparent ones are almost invisible. This ring is very important to keep wow/flutter low. It can either stay inside the cavity of the capstan wheel (OK) or on the FG coil: In this case insert it back on the capstan and push it inside the cavity of the capstan wheel.
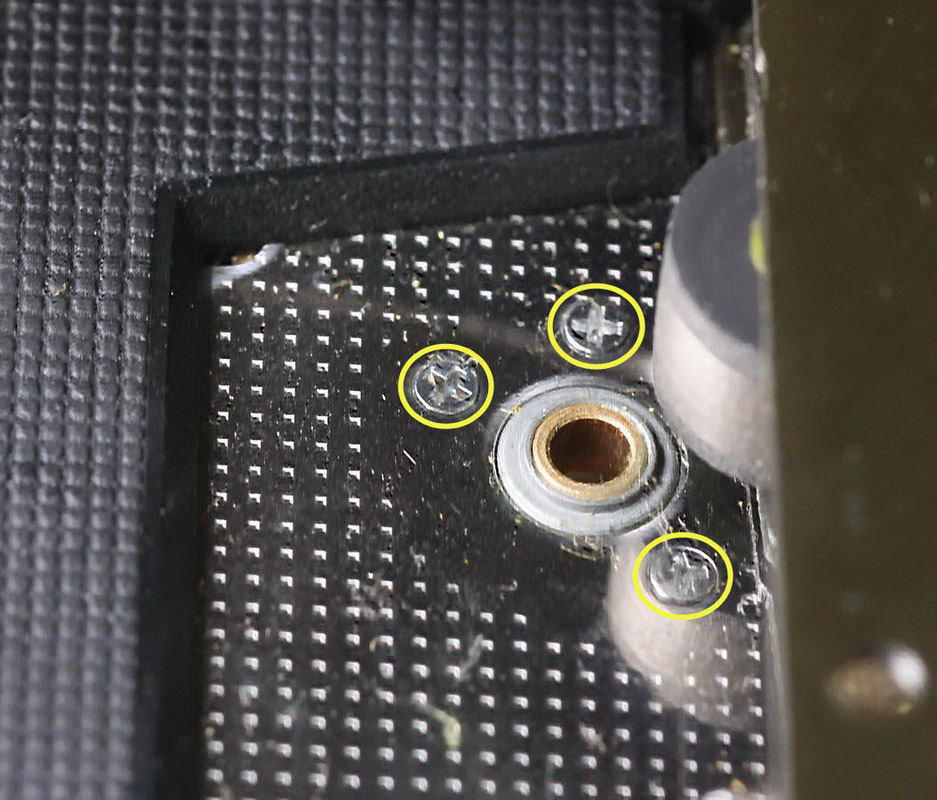
FG coil removal
Remove the FG coil displayed on the above image. Flip the walkman, mechanics down, and unscrew the three screws located from the cassette compartment side.
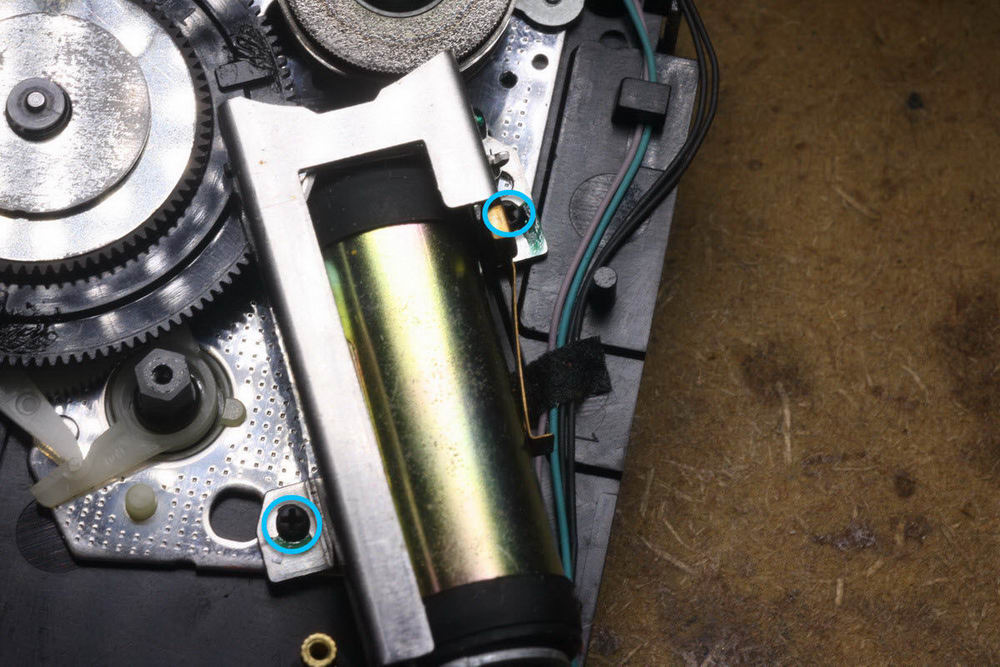
Motor removal
Simply unscrew the two screwsmarked in blue that hold the motor. Push the screwdriver firmly while trying to release them.
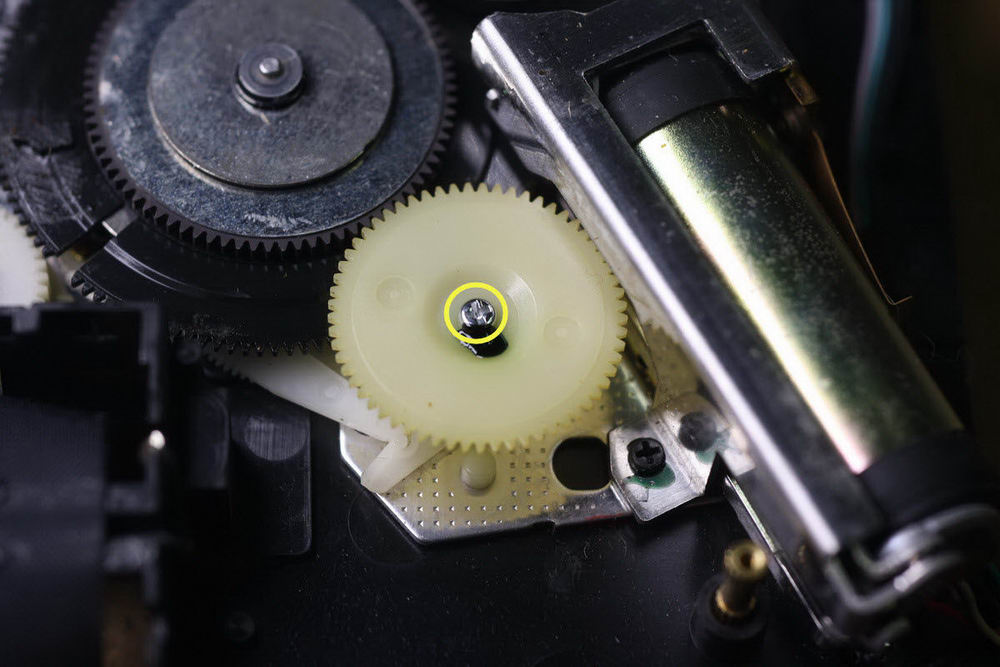
Take-up gear assembly removal
- Remove the large plastic gear by unscrewing the screw located in the center of it.
- Remove the small gear that is located under the large gear.
- Remove the spring.

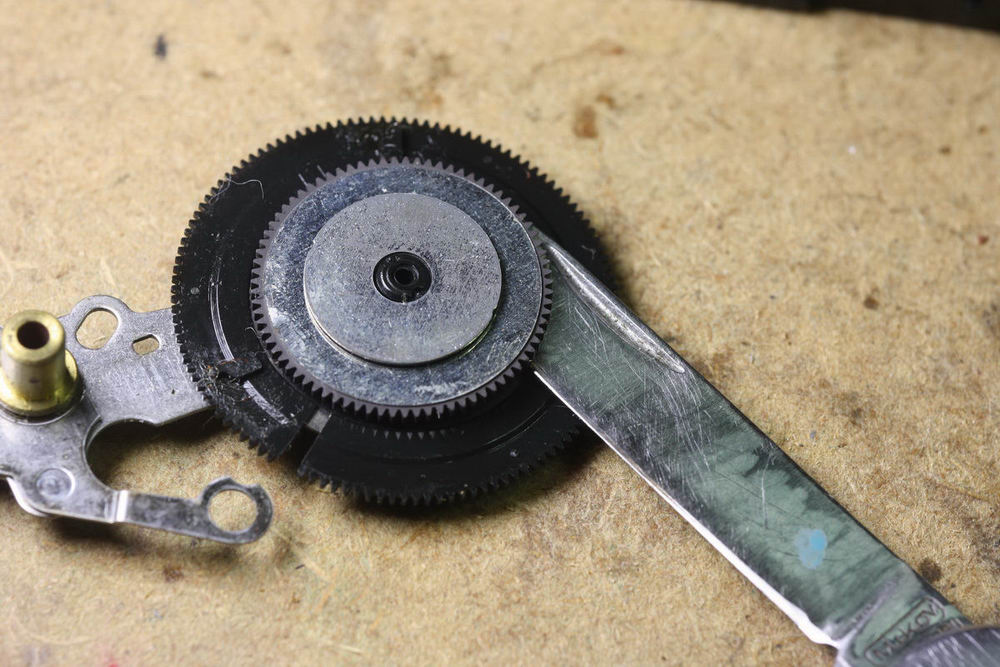
Center gear removal
To remove the center gear from the mechanics you have to remove the two washers that hold it. Be careful not to lose these parts while removing them.

Hold the other hand above the gear, to avoid ‘shooting’ washer to get lost. There is a spring located under the gear arm. Take it out.
Now disassemble the gear itself.


Warning! There is a tiny transparent plastic ring inside. Do not lose it!